
If you’re a proud owner of a Chevy Trailblazer, chances are you’ve experienced the thrill of hitting the open road in this rugged and versatile SUV. However, beneath its tough exterior, Chevy Trailblazer ignition coil problems have surfaced frequently, which troubled many owners.
From mysterious warning lights to sudden engine sputters, dealing with ignition coil problems in your Chevy Trailblazer can be a perplexing experience for any driver.
Whether you’re a seasoned automotive enthusiast or simply want to understand more about your vehicle’s inner workings, gaining insight into these common issues will empower you to address them effectively and prevent further complications down the road.
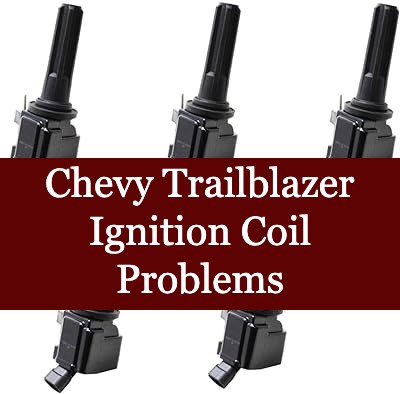
Chevy Trailblazer Ignition Coil Problems
One of the key factors contributing to ignition coil problems in the Chevy Trailblazer is the potential for moisture intrusion. This can lead to corrosion and electrical malfunctions within the ignition coils, causing them to fail prematurely.
Additionally, heat and vibration from normal vehicle operation can also contribute to the degradation of these components. Let’s see what complications the Chevy Trailblazer owners have gone through.
Rough Idling and Running
Chevy Trailblazer drivers, particularly those with models dating back to 2002-05, have reported experiencing rough idling and running problems. Additionally, they observed an illuminated check engine light.
Upon careful examination, it was determined that either a faulty plug wire or an ignition coil was primarily responsible for these issues. In case there is any confusion regarding the malfunctioning ignition coil, a diagnostic test can be performed using the following steps.
To test the ignition coil, follow these steps: First, disconnect the ignition coil output wire from the distributor cap. Then, attach a spark plug to the end of this wire and connect a ground wire to the spark plug’s threaded portion.
Next, disconnect the ignition coil ground wire from the negative terminal on the coil (Green Wire) and connect one end of a ground wire to this terminal. Turn on the ignition switch and tap the other end of the ground wire jumper on a good grounding point while observing sparks at the spark plug that correspond to your tapping frequency.
If you see a good spark, it indicates that the ignition coil is in good condition. If not, check for approximately 12 VDC from both the coil positive terminal (black wire) and the negative terminal (Green wire) to ground with the ignition switch in the ON position.
In addition to the previous test, you have the option to conduct a resistance check on the ignition coil to verify its condition. Here’s how to do it: 1. Measure the primary coil resistance by using an ohmmeter to connect the positive (Black wire) and negative (Green wire) terminals on the coil.
The resistance should fall within 0.4 to 0.6 ohms. 2. Measure the secondary coil resistance by using an ohmmeter to connect the coil output terminal and the ignition coil negative terminal. The resistance should be in the range of 5000 to 7200 ohms.
Frequent Coil Failure
In the early 2000s, certain Trailblazer models experienced burnout ignition coil issues caused by water entering the spark plug tubes. A technical service bulletin (TSB) addresses this problem and offers an updated weather strip to divert water away from the affected area.
When replacing the weather strip, caution is advised as it is attached over plastic cover studs, which may develop hairline cracks on the 1st, 2nd, and 3rd spark plugs.
Additionally, voltage regulator problems in the alternator could arise due to excessive supply voltage from a failed regulator. This can lead to failures in various subsystems such as cruise control and ignition coils.
Therefore, it is recommended to replace all six coils in vehicles equipped with the 4.2-liter inline-six engine to prevent potential sequential failures. These coils operate under high-stress conditions, firing several thousand times per minute at voltages of 50-60 thousand volts.
To ensure optimal performance and longevity, it is advised to source replacement coils from GM rather than opting for cheaper aftermarket options made in China, which are often plagued by defects and poor craftsmanship.
Misfiring Cylinder 3
In 2003, owners of Trailblazers reported problems with cylinder 3 misfiring, which led to the identification and replacement of the ignition coil. Despite this, the issue recurred when another coil failed, causing concern among owners about a potential underlying problem in cylinder 3.
If you have also experienced these issues, we recommend inspecting the coil connector. A faulty signal from the connector may be causing the misfiring of the coil. Local parts suppliers may have this connector in stock.
Additionally, using a digital temperature gun to check if all cylinders are at the same temperature by examining the exhaust pipes or utilizing a scanner to identify any codes that appear when the check engine light comes on could be helpful diagnostic steps.
How to Replace Chevy Trailblazer Ignition Coil
For replacing the ignition coil on a Chevy Trailblazer, you will need a set of basic hand tools including a ratchet, sockets, and screwdrivers. Additionally, it’s essential to have the specific replacement ignition coil for your Trailblazer model, as well as any gaskets or seals required for installation.
Ensure the replacement unit is high-quality and compatible with your vehicle. Sourcing genuine OEM parts or trusted aftermarket alternatives to guarantee proper fit and performance.
Next, disconnect the battery to ensure safety during the replacement process. After that, remove any components or wires blocking access to the ignition coil. Then, carefully unfasten and remove the old ignition coil from its mounting location.
Before installing the new ignition coil, make sure it matches the specific model of your Chevy Trailblazer for a proper fit. Once you have confirmed this, securely fasten the new ignition coil in place.
Reconnect any components or wires that were previously removed and double-check their connections. Finally, reattach the battery and test out the new ignition coil to ensure it’s functioning properly.
Final Words
Chevy Trailblazer ignition coil problems can be a frustrating and costly issue for owners. The frequent need for replacement and the potential for engine misfires can lead to safety concerns and decreased vehicle reliability.
Trailblazer owners need to stay vigilant and proactive in addressing any signs of ignition coil failure, such as rough idling or difficulty starting the engine. If you notice any symptoms of an ignition coil problem, it is crucial to seek professional assistance for diagnosis and repairs. Don’t wait until it’s too late, take action now to ensure the safety and functionality of your vehicle.